Removing Painted Popcorn: The Mud-Roller Workaround
Slide 06 of our Popcorn Extraction Masterclass — four phases that bypass a paint layer instead of fighting it: sand the peaks, roll on thinned mud, and skim flat.
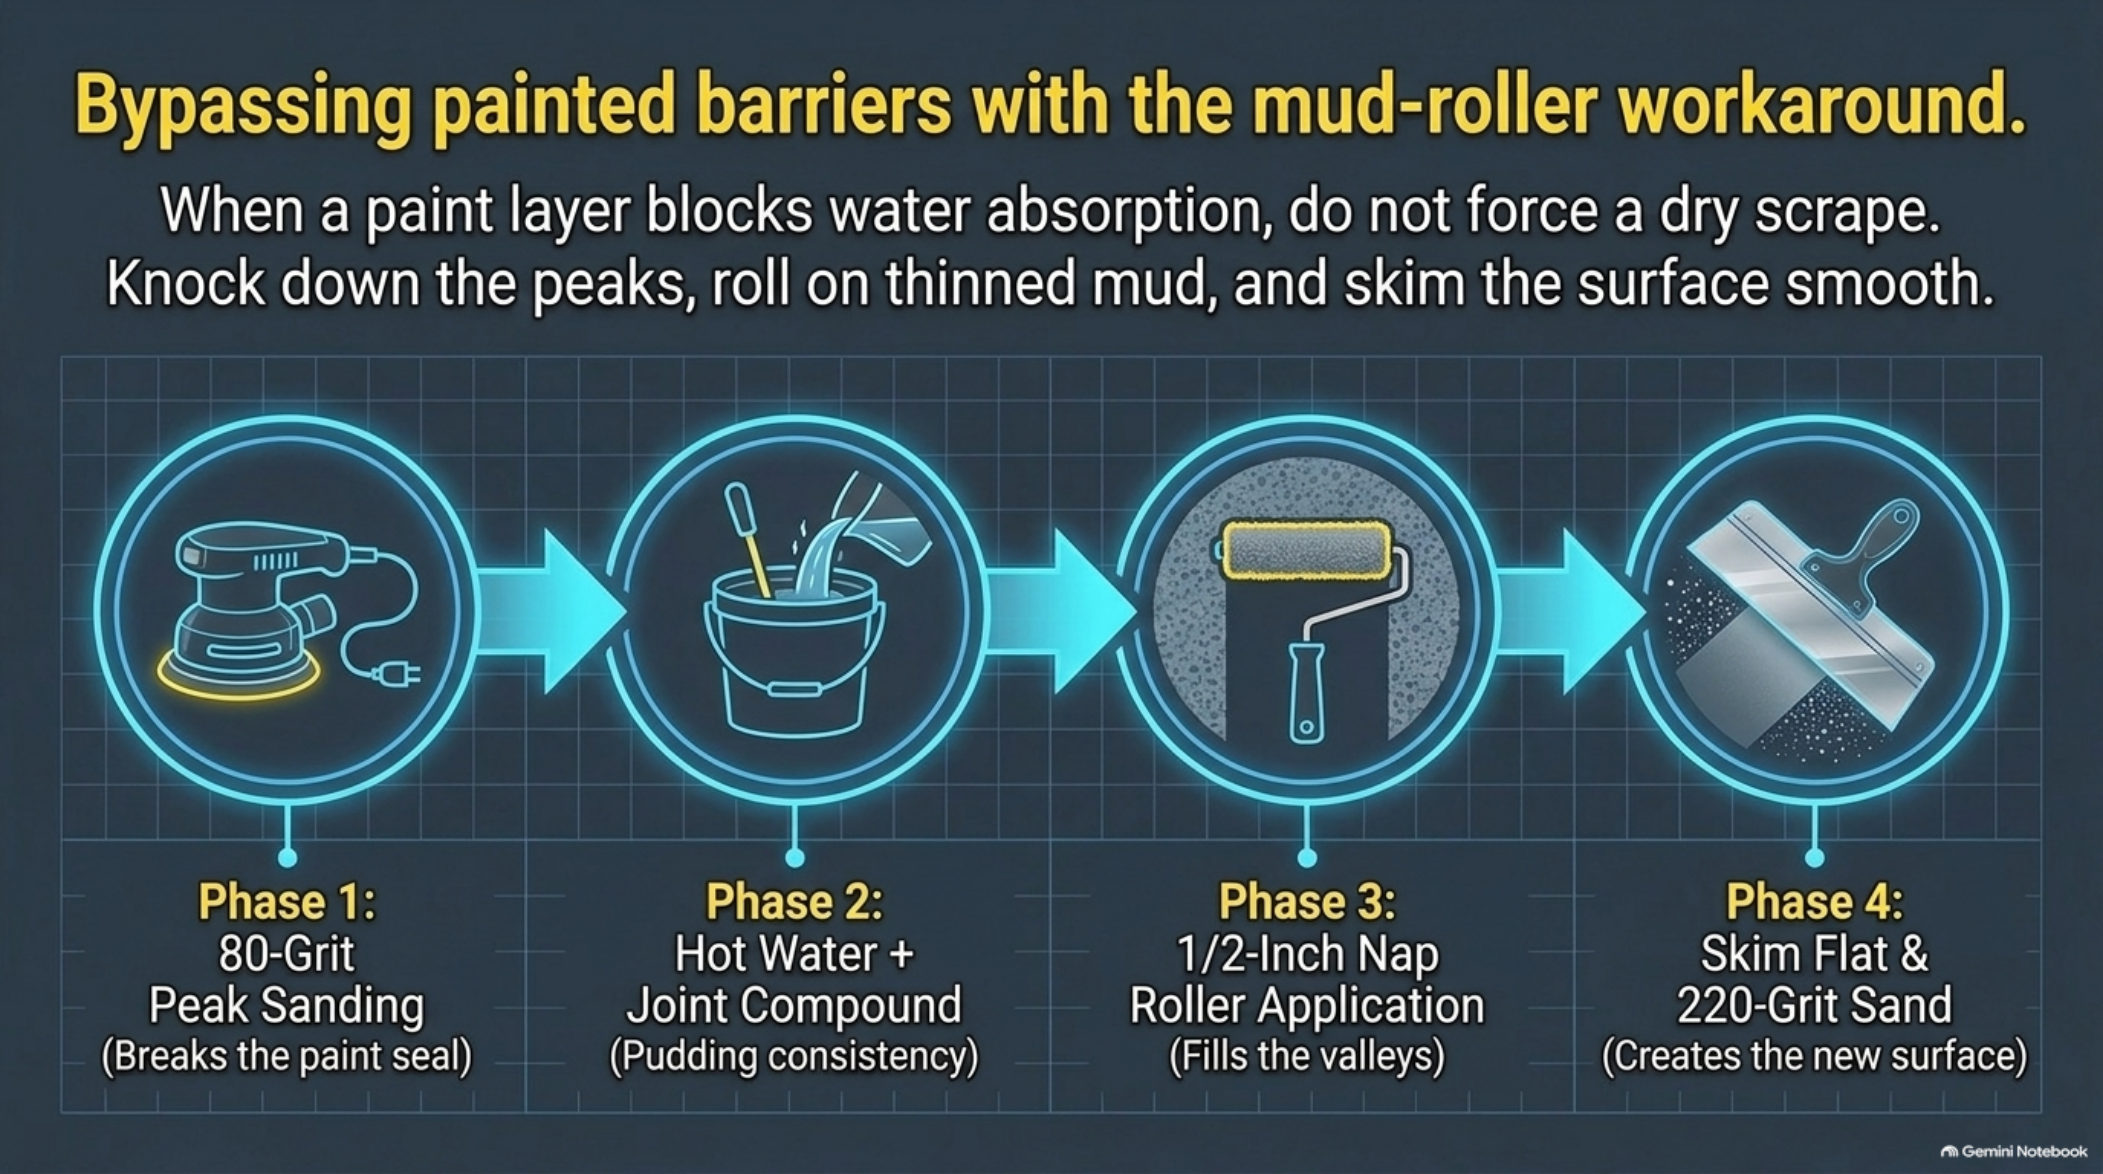
Every popcorn ceiling in Cary eventually faces the same problem: someone painted it. The texture that looked fine in the 1990s got a coat of flat white a decade later, another after that, and now the ceiling shrugs off water like a raincoat. Slide 06 of the masterclass deck, "Bypassing painted barriers with the mud-roller workaround," is the playbook for exactly this situation. When a paint layer blocks water absorption, the deck says it plainly: do not force a dry scrape. Knock down the peaks, roll on thinned mud, and skim the surface smooth.
The short version
- Wet scraping fails on painted popcorn because the paint seals the texture so water never reaches the binder, and scraping it dry tears the paper facing and gouges the drywall underneath.
- The mud-roller method has four phases: 80-grit peak sanding, rolling on thinned joint compound, skimming flat, and finishing with a 220-grit sand.
- Phase 1 sands the texture peaks with 80-grit paper to break the paint seal and score the surface so mud can grip, using a pole sander and keeping a HEPA vacuum running because dry dust is the hazard.
- Phase 2 thins all-purpose compound with hot water to pudding consistency, loose enough to pour off the mixer in a slow ribbon but thick enough to hold a soft peak for a moment.
- Phase 3 applies the mud with a 1/2-inch nap roller, since a short nap would ride on the peaks while the deep nap pushes compound down into the valleys between the popcorn bumps.
- Phase 4 pulls a wide skim blade across the ceiling to bridge low spots, then sands with 220 grit, checking the dried skim under angled light and vacuuming with HEPA afterward before primer.
Why Paint Breaks the Normal Wet Scrape
The wet scrape technique works because water dissolves the binder that glues popcorn to the drywall paper. Paint short-circuits the whole system: it sits on top of the texture and seals it, so water never reaches the binder no matter how long you wait. Scrape anyway and you are dry-scraping — prying texture off by force — which tears the paper facing and gouges the drywall underneath. The mud-roller method sidesteps the fight. Instead of removing the popcorn, it transforms it: knock the peaks off, fill the valleys with thinned joint compound, and skim the whole surface flat into what reads as a brand-new ceiling.
Phase 1: 80-Grit Peak Sanding — Break the Paint Seal
The first phase is quick and deliberate: sand the texture peaks with 80-grit paper until you have broken the paint seal on the high spots. You are not sanding the texture off — that would take forever and chew into the paper. You are flattening the peaks into rolling hills instead of a spike field and scoring through the paint so the mud has something to grab. Use a pole sander for speed, and keep a HEPA vacuum running; sanding creates dust, and the deck’s protocol treats dry dust as the hazard it is. If the home is pre-1980 and the texture was never tested, test before you sand at all.
Phase 2: Thin the Joint Compound to Pudding
Phase 2 is mixing. The deck’s formula: hot water plus joint compound to a pudding consistency. Use warm water — it blends faster and flows better — and stir in small increments until the mud has the body of pudding: loose enough to pour off the mixer in a slow ribbon, thick enough to hold a soft peak for a moment. All-purpose compound is the standard choice for this coat. Too thick and it will not flow down into the valleys between the popcorn bumps; too thin and it runs off the ceiling before it can set. Pudding consistency is the sweet spot where the compound is fluid enough to seek the low spots but stable enough to stay put.
Phase 3: Roll It On With a 1/2-Inch Nap
With the mud thinned, phase 3 is application: a 1/2-inch nap roller. The nap is the whole point. A short-nap roller would ride on the peaks and never touch the valleys, while the deep 1/2-inch nap pushes compound down into the low spots between the bumps and back-fills them as you roll. Work in overlapping passes and keep the coat even — you are filling the valleys, not stacking a layer on top. When the coat is down, the ceiling should look like a uniform mud surface with the old peaks barely showing through.
From our Popcorn Extraction Masterclass deck
Let that coat dry completely before anything touches it. Drying time varies with humidity — in Cary’s damp summer air it can run longer than you expect — so judge by feel: the mud should be uniform in color with no cool, dark patches before you move to the finish.
Phase 4: Skim Flat, Then Finish With 220-Grit Sand
The rolled mud fills the texture, but it leaves a surface that is close to flat, not flat — which is why the deck’s final phase is skim flat, then sand with 220 grit. A wide skim blade pulls a thin finish coat across the whole ceiling, bridging any remaining low spots, and once that dries, 220-grit sanding knocks down the fine ridges and leaves the smooth surface that reads as a new ceiling. Two details separate a good result from a great one. Check the dried skim under angled light before sanding — the deck’s own slide on directional lighting shows how overhead light hides ridges that a work light exposes. And sand lightly: 220-grit is a finishing abrasive, and heavy pressure will cut through to the old texture. After sanding, vacuum with HEPA and the surface is ready for primer.
Mud-Roller vs. the Alternatives
The mud-roller method is the right call for painted texture in reasonable condition. Ceilings with heavy damage or many paint layers may call for a different route, and texture that was never painted is still faster to wet-scrape. Our wet-scrape vs. mud-roller comparison walks through both methods side by side so you can match the technique to your ceiling. Either way, the toolbox’s calculators include a painted-ceiling mode that sizes your skim coats, compound, and sandpaper for the room.
Painted Popcorn FAQ
Can I just wet-scrape a painted popcorn ceiling anyway?
No — and trying is how ceilings get ruined. Paint blocks water from reaching the binder, so the texture never softens, and scraping it dry pulls the paper facing off the drywall in strips. The mud-roller route exists precisely so you never have to fight that battle.
How thin should the mud be for the roller?
Pudding consistency — the deck’s own term. Mix joint compound with hot water until it pours in a slow, thick ribbon and holds a soft peak. If it runs off the roller in drips, add compound; if it leaves roller marks that will not fill in, add a splash more water. Expect to tune the mix once or twice on your first roller full.
Do I still need a full skim coat after rolling on the mud?
Yes. The rolled coat fills the valleys between the old texture bumps, but the peaks still show through as subtle highs and lows. A flat skim coat over the top evens everything out, and the 220-grit pass after it dries removes the last fine ridges. Roll, skim, sand — skip any of the three and you will see the old texture ghost through after primer.
The mud-roller workaround is slide 06 of the Popcorn Extraction Masterclass. The natural reads around it: The Wet Scrape Technique: How Pros Remove Popcorn Without Gouging for unpainted ceilings, and Popcorn Ceiling Containment: Sealing the Room Before You Scrape for the setup every job starts with. Need a hand with a painted ceiling in Cary? Call (984) 228-9926 or get matched with a vetted local pro.